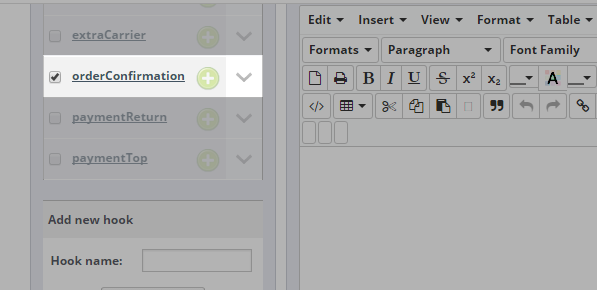
Check step by step guide about adding conversion tracking code to your website. Implementation of FB pixel with html box pro is very easy - and in this guide i show you how to do that.
In this guide I will show you an easiest and quickest way to include facebook conversion tracking pixel to your website. I decided to write this tutorial because I see on official prestashop forums that many PrestaShop users don't know how to add FB pixel to shop. Whole guide will be based on our html box pro module that allows to place custom contents to any part of website (with many conditions related to appearance of code). html box pro module is an advanced multitool for PrestaShop that allows to build blocks with custom contents (so also with tracking codes). If you don't have the html box pro module, you can try with cheapest FBPIXEL conversion tracking solution
How to add FB conversion pixel?
Facebook Conversion tracking pixel is a feature that allows to track conversion on your website. Using the Facebook pixel, you can leverage the actions people take on your website across devices to inform more effective Facebook advertising campaigns From technical point of view The Facebook pixel is a piece of JavaScript code. Because of this - to put it to the shop - it will be necessary to integrate this javascript code with your page. So, what are the steps to get FB pixel and include it to prestashop?
Tracking pixel code
I assume that you generated own pixel on facebook ads manager page. Usually tracking conversion pixel code looks like below:
<!-- Facebook Conversion Code for Test --> <script>(function() { var _fbq = window._fbq || (window._fbq = []);
if (!_fbq.loaded) { var fbds = document.createElement('script'); fbds.async = true; fbds.src = 'https://connect.facebook.net/en_US/fbds.js';
var s = document.getElementsByTagName('script')[0]; s.parentNode.insertBefore(fbds, s); _fbq.loaded = true; } })(); window._fbq
= window._fbq || []; window._fbq.push(['track', '6014421445677', {'value':'0.00','currency':'USD'}]); </script> <noscript><img
height="1" width="1" alt="" style="display:none" src="https://www.facebook.com/tr?ev=6014421445677&cd[value]=0.00&cd[currency]=USD&noscript=1"
/></noscript>
Treat code above as an example. I highlighted line where you can see 6014421445677 number. This is the pixel ID. Each user has different pixel ID so dont use code above (just use own code ). This line contains also value variable (0.00) and currency variable 'USD'. At the end of the code you can see <img> tag with the same variables, i mean: pixel id, value, currency code.
<noscript><img height="1" width="1" alt="" style="display:none" src="https://www.facebook.com/tr?ev=6014421445677&cd[value]=0.00&cd[currency]=USD&noscript=1"
/></noscript>
We must replace 0.00 and USD with dynamic variables because customer can place orders in different currencies, and value of each order can be different. We will do it with html box pro module. So now you can go to the second step of this guide
Install fb conversion pixel with html box module
As i already mentioned this guide will be based on custom contents module called html box pro . Follow steps below to integrate the facebook pixel with your website.

<!-- Facebook Conversion Code for Test --> <script>(function() { var _fbq = window._fbq || (window._fbq = []);
if (!_fbq.loaded) { var fbds = document.createElement('script'); fbds.async = true; fbds.src = 'https://connect.facebook.net/en_US/fbds.js';
var s = document.getElementsByTagName('script')[0]; s.parentNode.insertBefore(fbds, s); _fbq.loaded = true; } })(); window._fbq
= window._fbq || []; window._fbq.push(['track', '6014421445677', {'value':'{order_total_paid}','currency':'{order_currency_iso_code}'}]);
</script> <noscript><img height="1" width="1" alt="" style="display:none" src="https://www.facebook.com/tr?ev=6014421445677&cd[value]={order_total_paid}&cd[currency]={order_currency_iso_code}&noscript=1"
/></noscript>
After save of this block, these variables will be replaced with values from order specification and conversion pixel will appear on order confirmation page properly. It will work as facebook suggest then.

Artykuł napisany przez Milosza Myszczuka, eksperta PrestaShop i oficjalnego moderatora społeczności PrestaShop. CEO i założyciel agencji interaktywnej VEKIA. Dowiedz się więcej.
If you like this article, support our work!

Automatic National Bank of Ukraine (NBU) currency rates integrator. The module guarantees precise pr...
19.99 €

Streamline your order fulfillment process with the Order PDF Export module for PrestaShop. This esse...
39.99 €

Automatic Bank of Spain (Banco de España - BdE) currency rates integrator. The module guarant...
19.99 €

The Currency Exchange Module offers unparalleled flexibility in managing international sales. Regard...
19.99 €