Check step by step guide where i explain how easily you can create fancybox gallery on cms pages. Modification requires really minor change in prestashop files. Enjoy!
In this tutorial i want to describe the process of adding fancybox gallery to any CMS page in your PrestaShop 1.7.x. Modification that i described here works in classic theme and it should work also in other templates because guide is independent from templates. Guide is based on another free tutorial that allows to extend rich text editor or commercial module tinymce pro
| Fancybox gallery before click | fancybox gallery - zoom picture |
 |
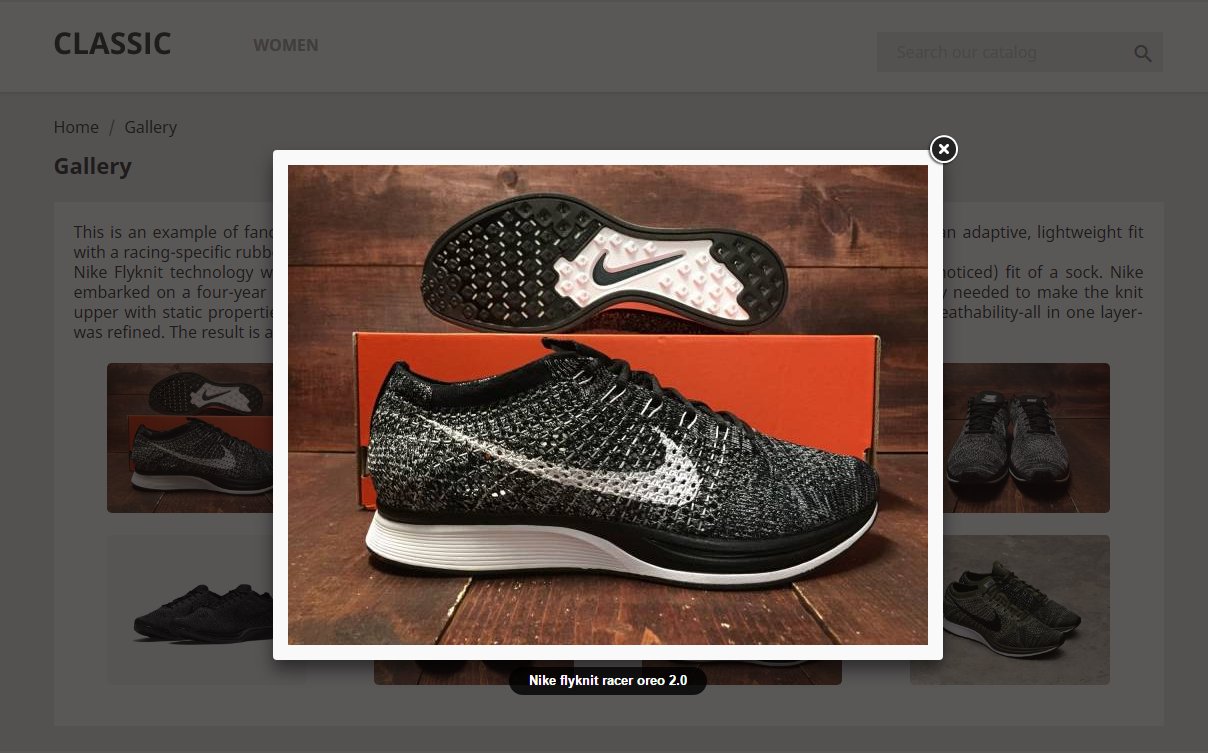 |
Add fancybox gallery to your CMS pages
Whole guide is based on two things: CMS controller modification and special code that we have to include into the cms page editor (while we will edit cms page contents). Whole guide is very easy to use so you don't have to be tech-savvy to make it work properly.
Cms Controller modification
First step is a modification of CMS controller. So please open a file controllers/front/CMSController.php. There is a function called "initContet()". This function init the CMS page, its contents and generates the view on the front office. We must add a code that will generate CMS page with fancybox library included to page body. So, please search for "public function initContent()" code like i show below
    /**
     * Assign template vars related to page content.
     *
     * @see FrontController::initContent()
     */
    public function initContent()
    {
Right after opening bracket "{" please add a code to add fancybox library:
$this->addJqueryPlugin('fancybox');
So, the modified begining of the initContent() function should look like below (i highlighted line that i added)
    /**
     * Assign template vars related to page content.
     *
     * @see FrontController::initContent()
     */
    public function initContent()
    {
        $this->addJqueryPlugin('fancybox');
CMS page contents - build a images gallery
Now it is time to build contents on our cms page. Please go to your shop back office to section Design > pages and create or edit page to which you want to include fancybox gallery. Whole construction process of gallery we will start with construction of the thumbnails. On example above where i show the gallery i've got 4 pics per row. To create such kind of effect please use table tool and create 2x4 table, like i show on the screenshot:
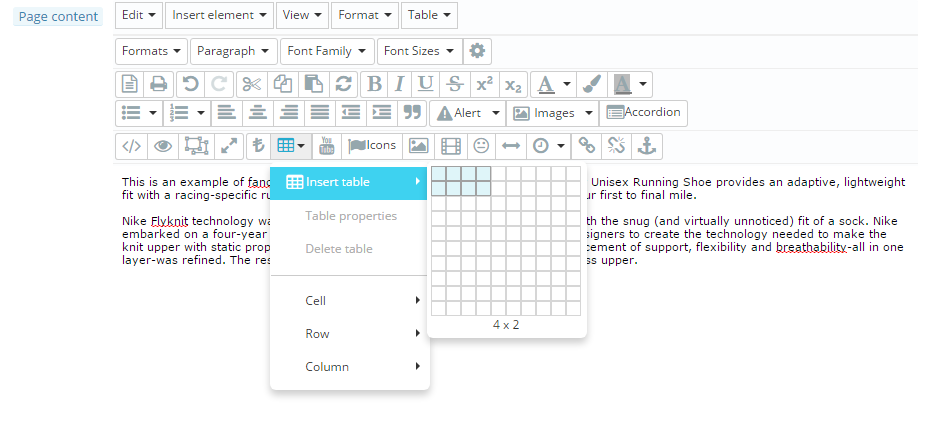
Table width property
Then click on table tool again and select option "Table properties". You will see popup with some settings related to table you created. To "width" setting please paste 100% (we want wide table with 4 cells pe row). In the next step we will include pictures to cells. You can see the screenshot of "table properties" feature below:
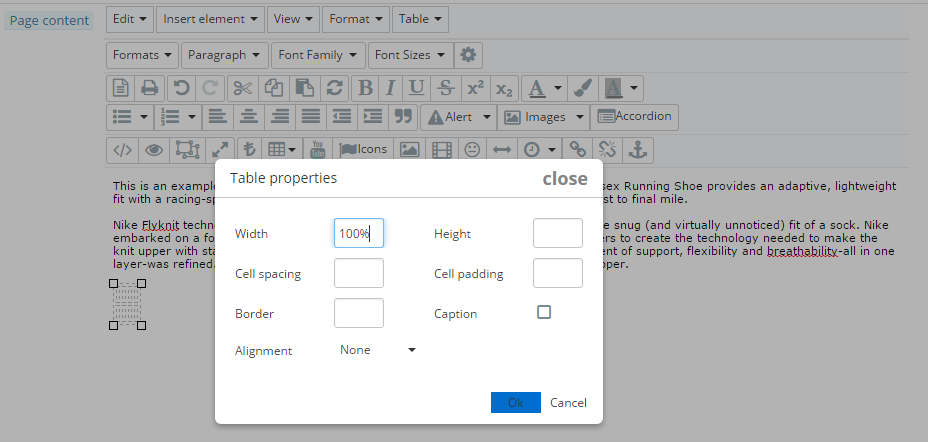
Include pictures to table cells
To include picture to the cell please click on "image" tool and then go to section where you can upload pictures. You can see it on the screenshot below. Please upload own picture that you want to include to fancybox gallery and select it and insert to the editor. It is worth to define also width and height params to create nice tiny thubmbnail of picture. Copy also full url to the picture, we will use it in the next step.
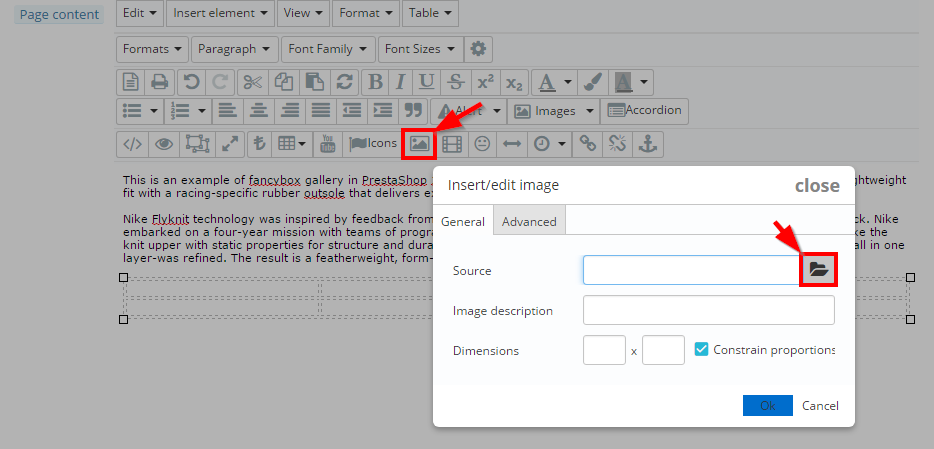
Add fancybox effect on picture click
Now it's time to include fancybox effect that will be spawned once someone will click on the thumbnail. Just lick on thumbnail that you added to the table cell. And hit "link" feature available in tinymce toolbar. You will see popup with link options. To "Url" field please paste url to your original image (copied previously). Add title if you want and from "Class" section select "fancybox" (it is very important, otherwise fancbox will not work for this image). You can see details below:
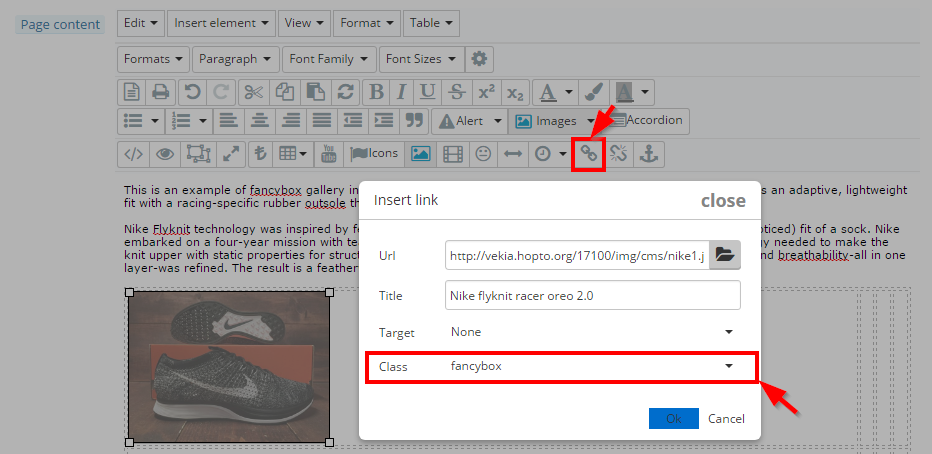
"Class" menu available above is a part of tinymce pro module. If you applied changes to tinymce with tutorial about extending rich text editor options you will have to apply class="fancybox" manually with souce code tool. Repat process for each available cell in the table (or as many times as you need). Your image gallery will be ready then. And you will be able to go the the last step of the guide.
Script to turn on fancybox gallery
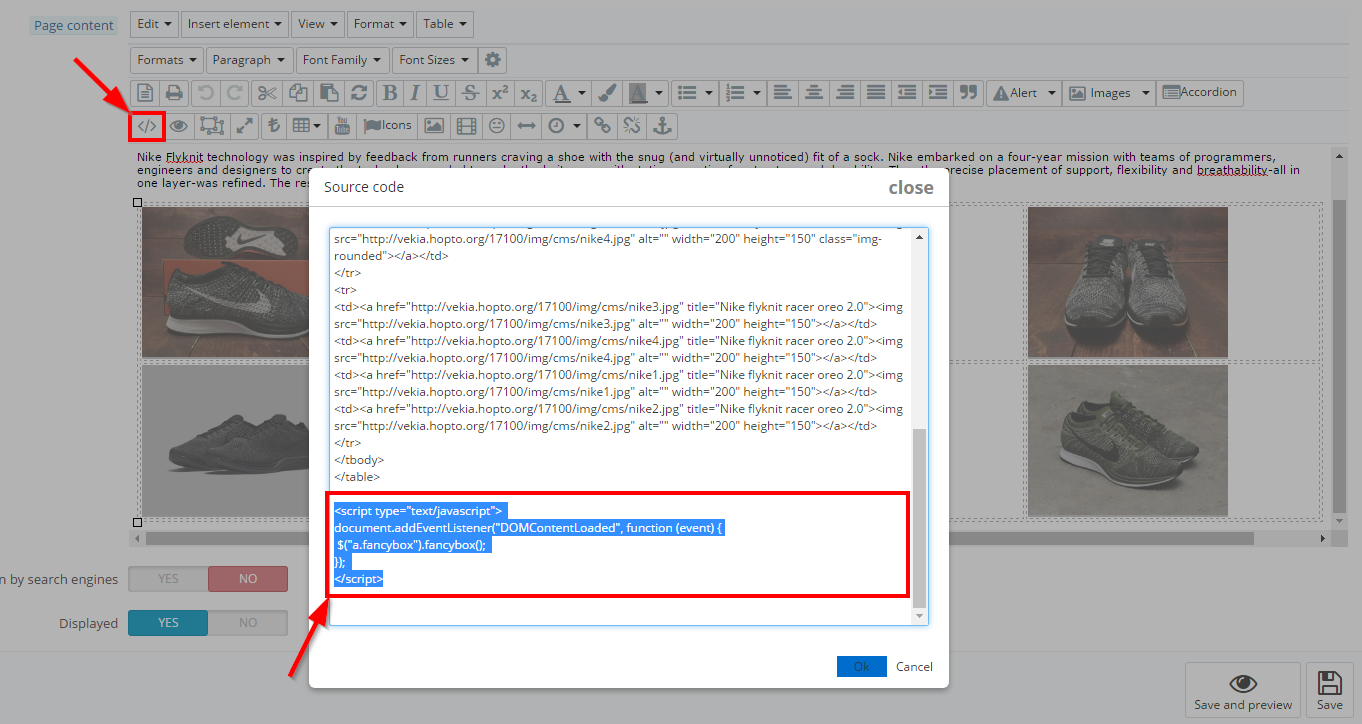
Now its time to turn on fancybox gallery effect fo each picture we added to the table cell. To do it, you have to use source code tool available in tinymce editor. Just hit it and you will see the popup. At the end of the contents please paste script code attached below. This javascript code adds fancybox to each image link with class="fancybox". So, after that - link will appear as a fancybox popup.
<script type="text/javascript">
document.addEventListener("DOMContentLoaded", function (event) {
 $("a.fancybox").fancybox();
});
</script>
You can take a look on the picture, you will see where to click to turn on source code tool and where to paste the code - just do it at the end of contents.
If you're looking for tutorial for PrestaShop 1.6.x - please check dedicated step by step tutorial about adding fancybox cms gallery to prestashop 1.6.x

Artykuł napisany przez Milosza Myszczuka, eksperta PrestaShop i oficjalnego moderatora społeczności PrestaShop. CEO i założyciel agencji interaktywnej VEKIA. Dowiedz się więcej.
If you like this article, support our work!

Automatic National Bank of Ukraine (NBU) currency rates integrator. The module guarantees precise pr...
19.99 €

The Currency Exchange Module offers unparalleled flexibility in managing international sales. Regard...
19.99 €

Automatic Bank of Spain (Banco de España - BdE) currency rates integrator. The module guarant...
19.99 €

Streamline your order fulfillment process with the Order PDF Export module for PrestaShop. This esse...
39.99 €