This article is about adding own fancy ribbons, badges, labels to product list with our html box pro module. Follow this guide to create custom ribbons for selected products on your shop product page listings (like category pages etc.)

This is an article about creating custom product ribbons. Of course the way of how I will do it can be used to add other things like badges, labels etc. The main expectaction that i've got is a possibility to create unique ribbon for selected products only - it should appear on list of products only for defined products. You can achieve this with mine module called custom contents blocks. So please install it in your shop. And go to the next step.
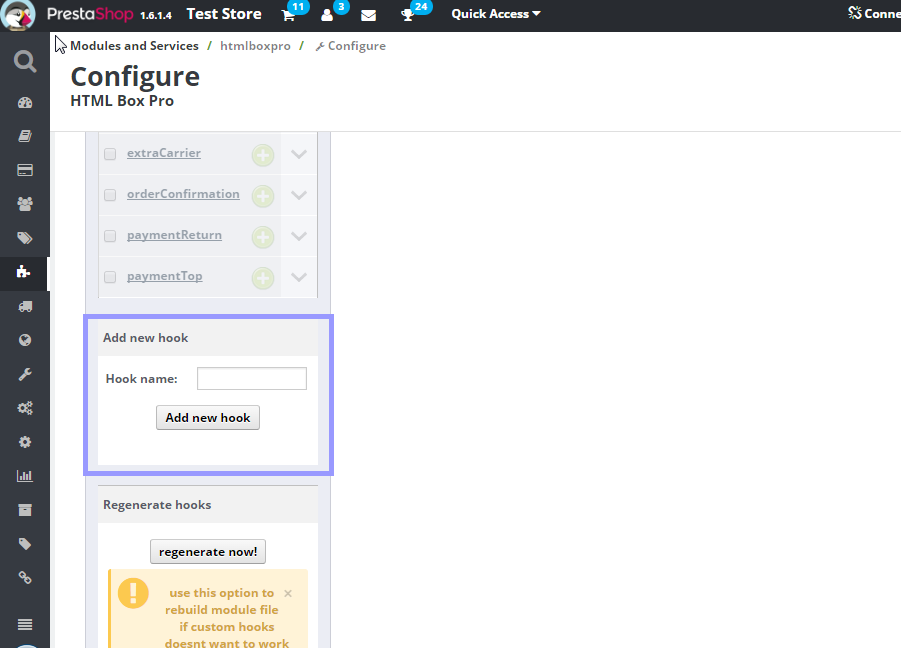
New hook to support customized product ribbon
As you probably know. my module html box pro allows to create blocks that will appear in custom hooks. In this addon you can create hooks too. For this guide, it is not necessary to create new hook (product-list.tpl file from your theme, if it is well coded should have hooks like: {hook h="displayProductDeliveryTime" product=$product}). But i decided to create new hook for this tutorial, it's because not each theme is well coded, so i will create new hook "just in case".
Create new contents with our ribbon
Now it's time to define contents of our block. With html box pro moduel you can create and display any kind of custom contents you want. You can display texts, videos, images etc. So, in fact, i will use this image only - block with these contents will be our ribbon. So please follow steps described below:
It's time to alter theme product-list.tpl to support your new hook.
Please open product-list.tpl file. This file is responsible for appearance of list of products in the shop. We have to paste there a little shortcode to spawn our new hook (to display contents). And that is all what we have to do in this file. So, please open it and search there for code like:
<a class="product_img_link" href="{$product.link|escape:'html':'UTF-8'}" title="{$product.name|escape:'html':'UTF-8'}" itemprop="url">
     <img class="replace-2x img-responsive" src="{$link->getImageLink($product.link_rewrite, $product.id_image, 'home_default')|escape:'html':'UTF-8'}" alt="{if !empty($product.legend)}{$product.legend|escape:'html':'UTF-8'}{else}{$product.name|escape:'html':'UTF-8'}{/if}" title="{if !empty($product.legend)}{$product.legend|escape:'html':'UTF-8'}{else}{$product.name|escape:'html':'UTF-8'}{/if}" {if isset($homeSize)} width="{$homeSize.width}" height="{$homeSize.height}"{/if} itemprop="image" />
</a>
replace it with:
<a class="product_img_link" href="{$product.link|escape:'html':'UTF-8'}" title="{$product.name|escape:'html':'UTF-8'}" itemprop="url">
     <img class="replace-2x img-responsive" src="{$link->getImageLink($product.link_rewrite, $product.id_image, 'home_default')|escape:'html':'UTF-8'}" alt="{if !empty($product.legend)}{$product.legend|escape:'html':'UTF-8'}{else}{$product.name|escape:'html':'UTF-8'}{/if}" title="{if !empty($product.legend)}{$product.legend|escape:'html':'UTF-8'}{else}{$product.name|escape:'html':'UTF-8'}{/if}" {if isset($homeSize)} width="{$homeSize.width}" height="{$homeSize.height}"{/if} itemprop="image" />
</a>
<div style="position:absolute; top:0px; right:0px;">{hook h='MyRibbon' product=$product}</div>
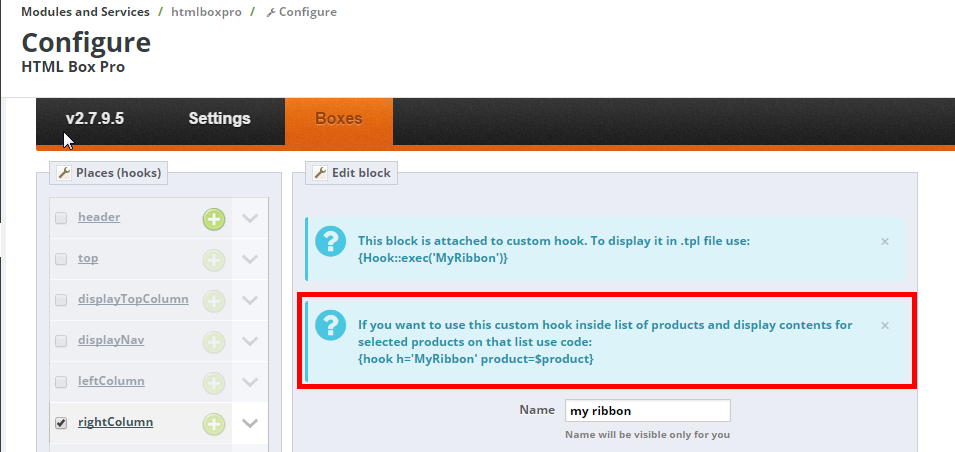
As you can see added there shortcode {hook h='MyRibbon' product=$product}. This is shortcode that will be responsible for appearance of contents attached to hook named "MyRibbon". If you created different hook, go back to your block edit page and grab suggested code (you can find it at the top of the block edit page: see screenshot). Save file and go back to your category page to see list of products with new awesome ribbon
Step by step videguide

Article written byMilosz Myszczuk, PrestaShop expert. CEO and founder of the VEKIA interactive agency. Learn more.
If you like this article, support our work!

Sell optional checkout services your customers choose: gift wrapping, shipping insurance, express ha...
149.00 €

Charge handling, service or packaging fees only when your rules match. Conditional Order Fees adds a...
129.00 €

Conditional Order Validation lets you block or warn checkout when a cart breaks your rules. Set cond...
129.00 €

Apply conditional order discounts using native cart rules. Create BOGO deals, buy N get M free, spen...
149.00 €


