Tutorial that shows the way of how to build feature that displays selected "color" attribute name. Really minor modification that creates cool feature to show name of the color.
In this tutorial I will show you how easily you can create feature to show selected color name (on product page that has color attribute). As you already know PrestaShop 1.7 has a feature to create "combinations". Combinations are product variants (product variant is based on product attributes: different sizes of shoes, different colors of t-shirts etc). Each product variant can have own unique values of attributes like size, material, color etc. In this guide we are focused on color attribute - selection of color attribute does not display the color name. This guide shows how to change it and display selected color attribute. Tutorial is based on "classic" template but it is applicable for all themes that are based on "classic" theme structure.

Modification of theme files
To create this feature we have to modify two classic theme files. custom.js - that contains custom javascripts and custom.css that is used to create custom css styles in template. Let's start with .css styles.
Modification of custom.css
File is located in this directory: themes/classic/assets/css/custom.css (if you use different theme than "classic" theme - open your theme directory instead). At the end of this file paste code attached below:
.ColorLabel:after {
    display:inline-block;
    content:attr(data-after);
    margin-left:5px;
    font-weight:bold;
}
Modification of custom.js
File is located in this directory: themes/classic/assets/js/custom.js (the same as previously if you use different theme than "classic" - open your theme directory instead). At the end of this file paste code attached below:
$(document).ready(function(){
 $(".input-color").parent().parent().parent().parent().find('.control-label').addClass('ColorLabel');
 $(".input-color:checked").each(function(){
   $(this).parent().parent().parent().parent().find('.ColorLabel').attr('data-after', $(this).parent().find('.sr-only').html());
 });


 prestashop.on("updatedProduct", function (){
  $(".input-color").parent().parent().parent().parent().find('.control-label').addClass('ColorLabel');
  $(".input-color:checked").each(function(){
    $(this).parent().parent().parent().parent().find('.ColorLabel').attr('data-after', $(this).parent().find('.sr-only').html());
  });
 });
});
Visibility of changes
That's all, after save of the files you should see the changes on product pages. If you do not see any difference it might be required to clear your browser cache because it remembers old .css and .js file contents. Simply saying: if after modification you do not see the difference - clear browser cache or refresh product page with key combination: ctrl+f5 (hard refresh with cache clear).
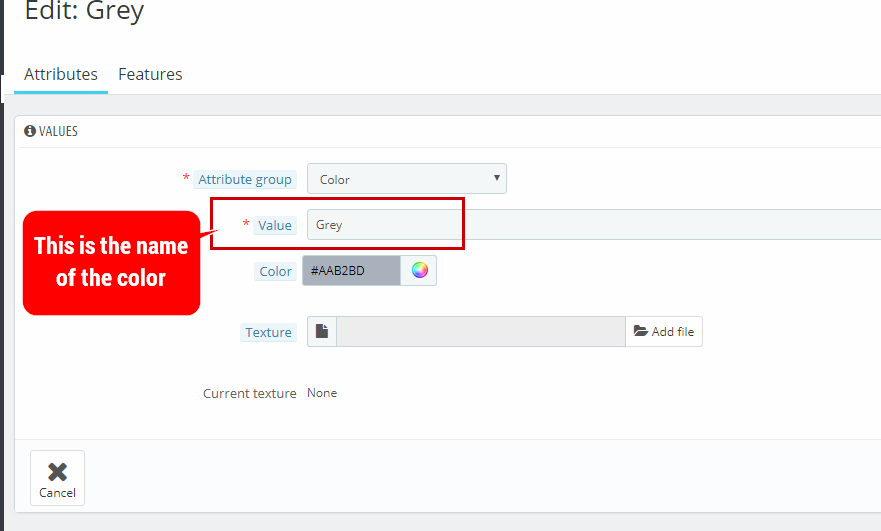
How to define color name?
Each color attribute value in PrestaShop allows to define 3 parameters:
- color
- texture
- color name
Module to display "name" of the color uses "color name" option available on color value configuration page (see screenshot)

Article written byMilosz Myszczuk, PrestaShop expert. CEO and founder of the VEKIA interactive agency. Learn more.
If you like this article, support our work!

Charge handling, service or packaging fees only when your rules match. Conditional Order Fees adds a...
129.00 €

Show or hide payment methods at checkout with powerful rule-based policies. Build AND/OR conditions ...
79.00 €
129.00 €

Apply conditional order discounts using native cart rules. Create BOGO deals, buy N get M free, spen...
149.00 €

Control which shipping carriers customers see at checkout. Shipping Method Rules is a PrestaShop pol...
129.00 €


