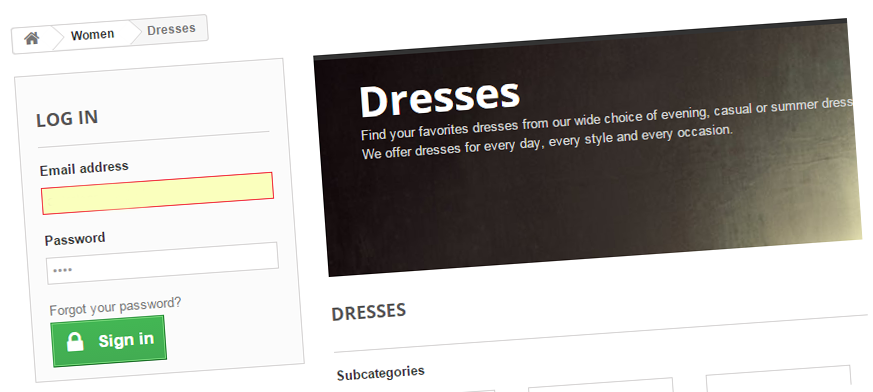
In this guide I want to show you how to create log in box located there, where you want. I will show you how to achieve it based on my free addon to create custom contents, and I will create log in box in left column of my test store. Of course you will be able to put it in other places like right column, footer, top section or just there where you want, for example - with html box pro module.

Free html box module installation
To create log in box easily, you will have to use some addon that allows to put custom contents to your online shop. I can offer absolutely free addon to build custom contents, as i already mentioned it is html box free. So just download and install module from website that i linked (you will download there always up to dated version of the addon that will support recently released version of PrestaShop).
Module configuration
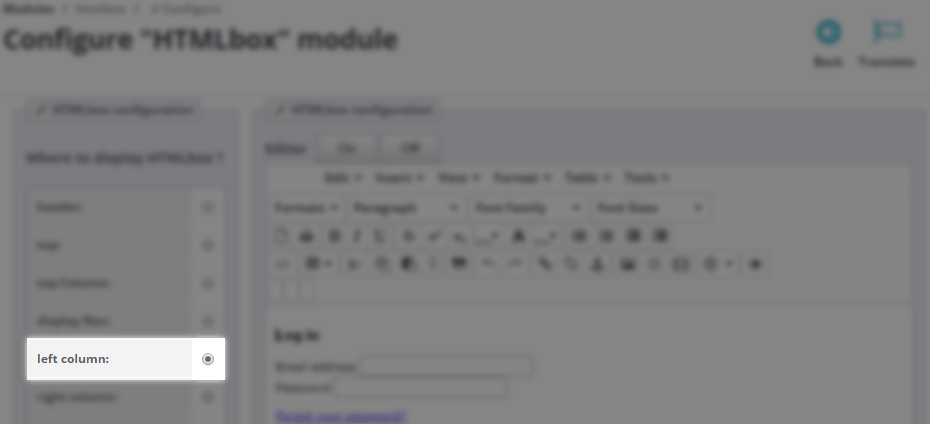
After module installation - go to addon configuration page. Inside left hand box you can find places where you can put own contents. Due to the fact, that i want t show you how to create custom login box inside left column - select it. Exactly as i show on the image below:

Code to create log in form
On module configuration page you can find also rich text editor. This is a place where you can define own contents. To create working log in form you have to use proper code, that will fit to your online store. The most important thing is to create code with proper name of fields and with proper url to authentication page. In this case you can copy and paste code that I show below. Then turn off rich text editor or use source code tool to paste this code. If you don't know where is "source code" tool, take a look on this image.
<div class="block">
<form action="http://your-website.com/en/login" method="post" id="login_form" class="box">
<h3 class="page-subheading">Log in</h3>
<div class="form_content clearfix">
<div class="form-group"><label>Email address</label>
<input class="is_required validate account_input form-control" id="email" name="email" value="" type="text" />
</div>
<div class="form-group">
<label>Password</label>
<input class="is_required validate account_input form-control" type="password" id="passwd" name="passwd" value="" />
</div>
<p class="lost_password form-group">
<a href="http://your-website.com/en/password-recovery" title="Recover your forgotten password">Forgot your password?</a>
</p>
<p class="submit">
<input type="hidden" class="hidden" name="back" value="my-account" />
<button type="submit" id="SubmitLogin" name="SubmitLogin" class="button btn btn-default button-medium"><span><i class="icon-lock left"></i> Sign in </span></button>
</p>
</div>
</form>
</div>
Please take a look on highlighted lines, you can find there "action" and "href" param (for <form> object and for <a> object). You have to change http://your-website.com/ to url of your online store. Please note that if you use many languages - you have to use also /en/ (or other language identifier). If you use only one language - it is enough to use just http://your-website.com/login/ as a param of action and href variables.
That's all!
After you will paste code and modify the urls, save changes. Your login form block should be visible on your front office left column section. As I already mentioned, in the same way you can create login form exactly there - where you want. With free html box module you can put it to most imporant locations in your shop, and with custom content addon pro version - you can place it anywhere you want!
videoguide

Artykuł napisany przez Milosza Myszczuka, eksperta PrestaShop i oficjalnego moderatora społeczności PrestaShop. CEO i założyciel agencji interaktywnej VEKIA. Dowiedz się więcej.
If you like this article, support our work!

Streamline your order fulfillment process with the Order PDF Export module for PrestaShop. This esse...
39.99 €

The Currency Exchange Module offers unparalleled flexibility in managing international sales. Regard...
19.99 €

Automatic National Bank of Ukraine (NBU) currency rates integrator. The module guarantees precise pr...
19.99 €

Automatic Bank of Spain (Banco de España - BdE) currency rates integrator. The module guarant...
19.99 €